Clash Verge · English Tutorial
Clash Verge Rev Guide: Download, Setup, TUN & Fixes
Clash Verge Rev is the maintained desktop continuation of Clash Verge for Windows, macOS and Linux. This guide covers the first-time workflow: choose the right installer, import a subscription, select a node, use Rule mode, and enable System Proxy or TUN.
Independent guide: Clash-verge.com is not operated by the software project. The authoritative source is the clash-verge-rev/clash-verge-rev GitHub repository.
Current stable release: v2.5.4, verified against GitHub Releases on August 7, 2026.
Start here #
- Need an installer? Choose the correct Windows, macOS or Linux package.
- Want to verify the source? Check the GitHub repository and safe download sources.
- Confused by the name? Compare Rev with the archived original Clash Verge.
- TUN will not start or has no internet? Follow the TUN and Service Mode troubleshooting guide.
- Subscription, white-screen or IPC error? Use the troubleshooting FAQ.
1. Install Clash Verge Rev #
For most computers, use one of these packages:
| Platform | Typical installer |
|---|---|
| Windows 10/11 x64 | Clash.Verge_2.5.4_x64-setup.exe |
| Windows on ARM | Clash.Verge_2.5.4_arm64-setup.exe |
| Apple Silicon Mac | Clash.Verge_2.5.4_aarch64.dmg |
| Intel Mac | Clash.Verge_2.5.4_x64.dmg |
| Debian/Ubuntu x64 | Clash.Verge_2.5.4_amd64.deb |
| Fedora/RHEL x64 | Clash.Verge-2.5.4-1.x86_64.rpm |
Use the platform-specific installer list for direct links and other architectures. Keep the default installation directory or use an ASCII-only path.
Current v2.x releases do not support Windows 7 and do not provide a maintained portable ZIP. Clash Verge Rev also has no official Android or iOS application; see the Android alternatives guide instead of installing a package advertised as an official APK.
2. Launch the application #
After installation, open Clash Verge Rev. A successful launch displays the main dashboard:
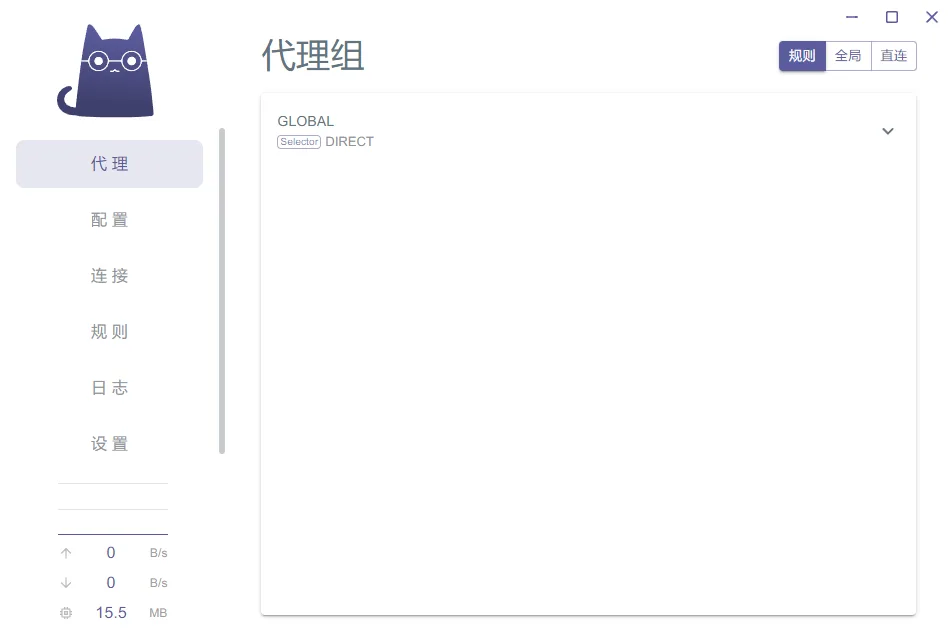
If the window is blank or the application closes immediately, check WebView2 on Windows, WebKitGTK on Linux, the installation path and leftover processes in the startup troubleshooting section.
3. Import a subscription #
Subscription profiles are normally supplied as a URL by your service provider.
- Open Profiles.
- Paste the subscription URL into the import field.
- Click Import or the corresponding action button.
- Select the imported profile and refresh it.
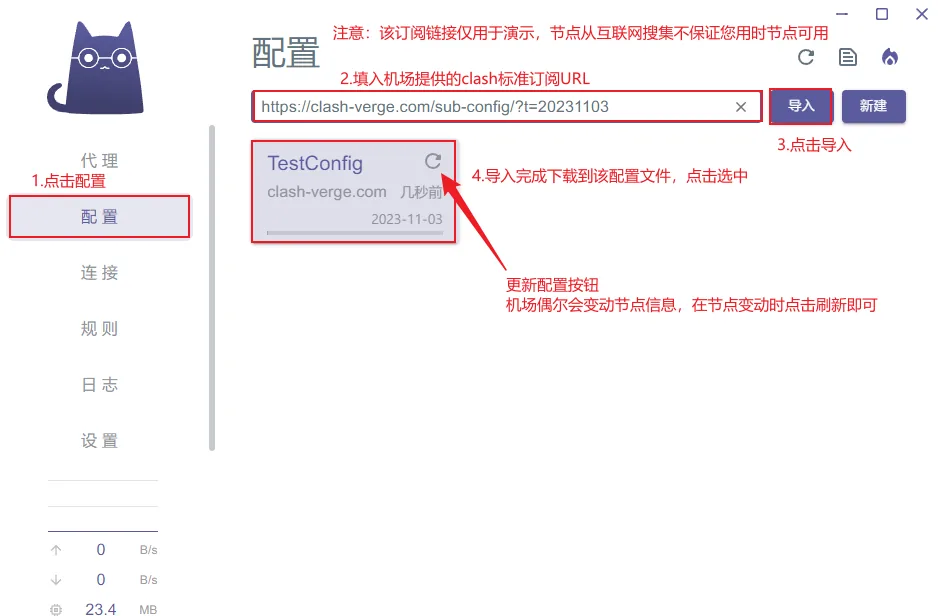
If the URL is expired, returns 403 Forbidden, or cannot be parsed as Mihomo-compatible YAML, use the subscription import diagnosis.
Import a local YAML profile #
You can also drag a valid Mihomo YAML file onto the Profiles page:
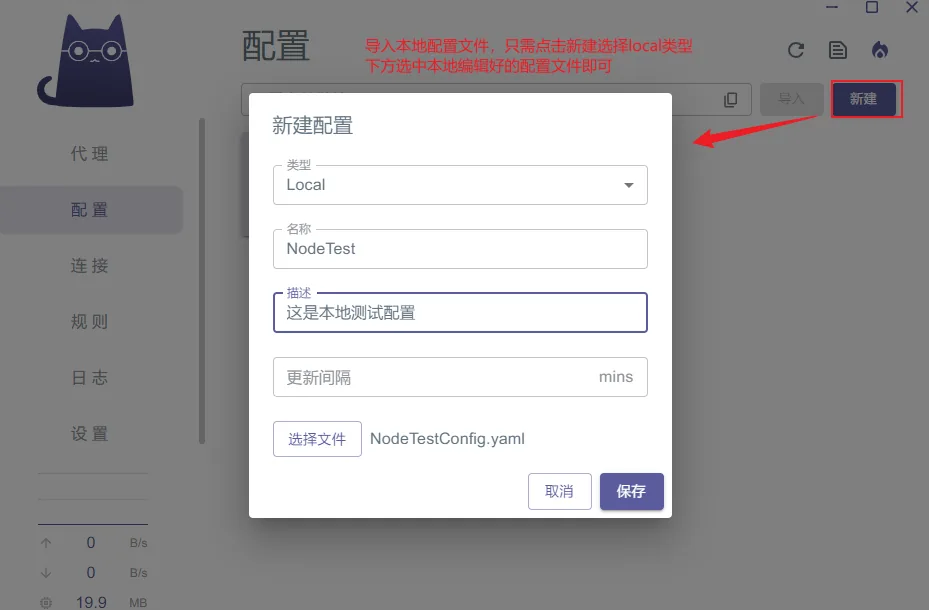
A minimal profile still needs valid proxies, proxy-groups and rules. If you only need to add one domain or process rule to an existing subscription, do not edit the downloaded file; use Edit Rule so the change survives subscription updates.
4. Test and select a node #
- Open Proxies.
- Expand the main selector group.
- Run the latency test.
- Choose an available node.
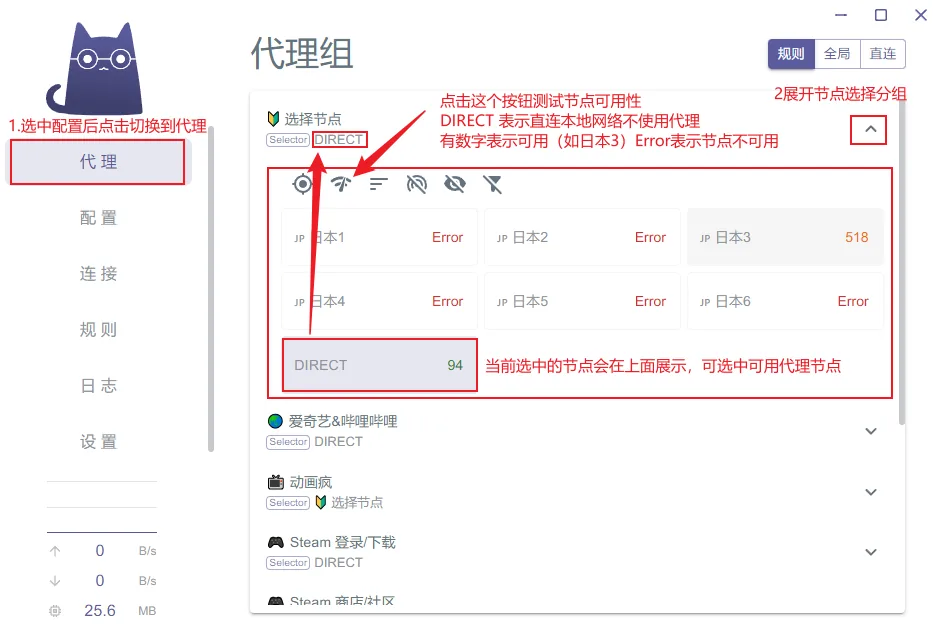
A successful latency test only confirms that the test URL responded. It does not prove that System Proxy or TUN is enabled. If tests pass but websites do not load, check the active network mode and DNS in the troubleshooting FAQ.
5. Choose Rule, Global or Direct mode #
- Rule: routes each request according to the profile rules. This is the recommended default for most subscriptions.
- Global: sends all matched traffic through the selected proxy group. Use it only for deliberate testing or a specific requirement.
- Direct: bypasses the proxy.
Use Rule mode first. If one site or application needs a different route, add a specific custom rule rather than switching everything to Global.
6. Enable System Proxy or TUN #
System Proxy #
Start with System Proxy. It is simple and works for browsers and applications that follow the operating-system proxy settings.
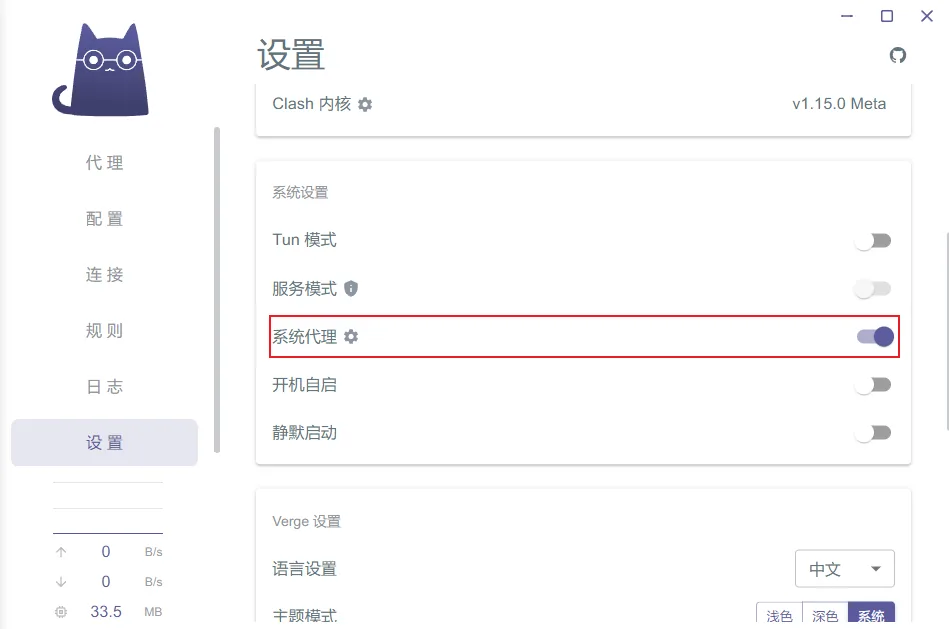
TUN mode #
Use TUN mode when an application ignores System Proxy or when you need broader device-level routing. TUN requires Service Mode or administrator privileges and depends on the built-in DNS configuration.
Do not enable several VPN/TUN applications at the same time while troubleshooting. Follow the full TUN mode, Service Mode and no-internet guide if the switch does not stay on, startup takes about 30 seconds, or the application reports IPC path not ready.
7. Verify the connection #
After selecting a node and enabling the chosen network mode:
- Open a website that should use the proxy.
- Check the Connections or Logs page to confirm the rule and outbound group.
- If needed, compare your public IP before and after enabling the proxy.
- Test another node before changing advanced settings.
For node latency testing, see the available 204 test URLs.
Next steps #
- Choose the correct installer
- Verify the GitHub project source
- Understand Rev vs the archived original
- Add custom rules that survive updates
- Configure TUN and Service Mode
- Change global DNS, ports or
system_proxy_bypass - Troubleshoot common errors
The full v2.5.4 change log is maintained on the GitHub release page.